How to Install TiSPY on Android inUnder 5 Min
4.8/5 — Trusted by 2M+ parents
Choose your phone brand to see customized installation instructions

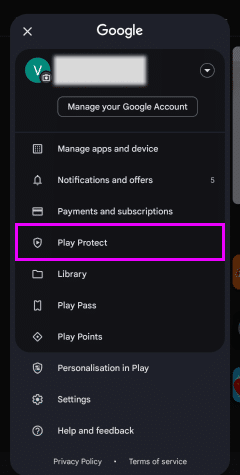
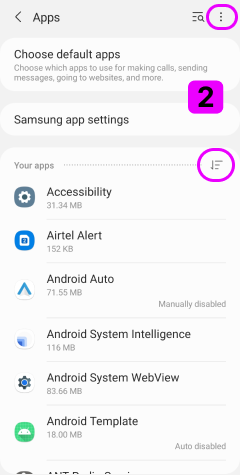
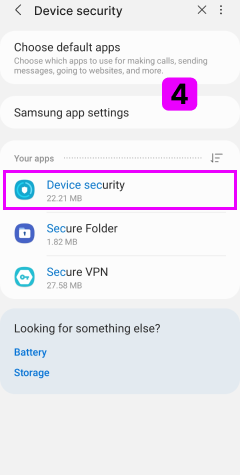
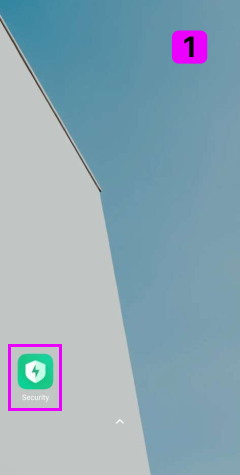
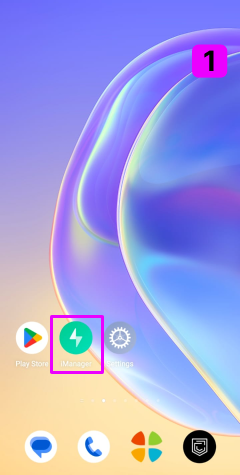

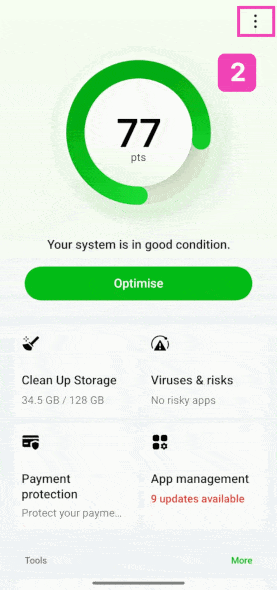
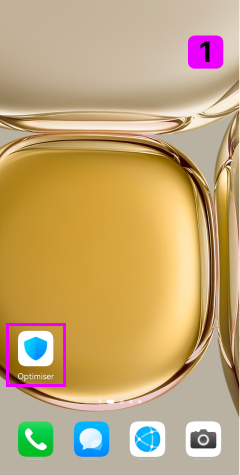
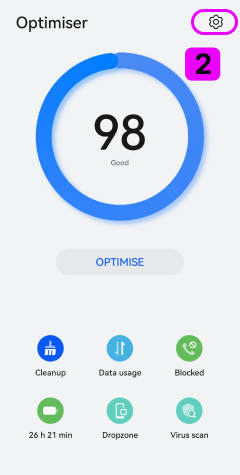
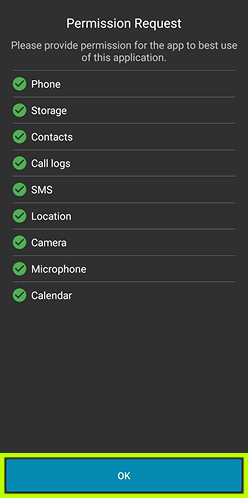
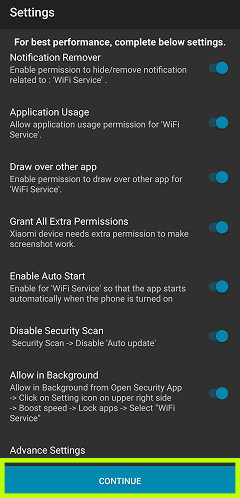
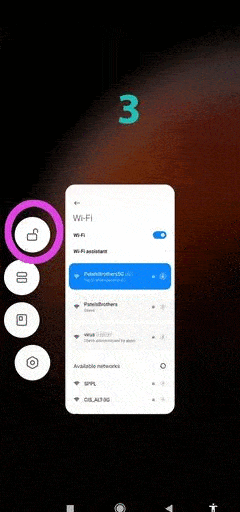
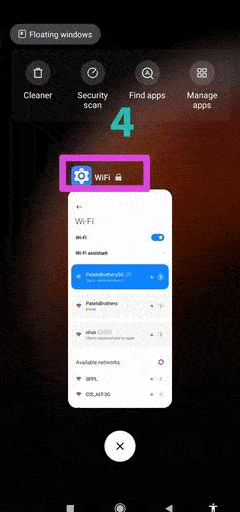
- 1Find the built-in security/antivirus app on your phone
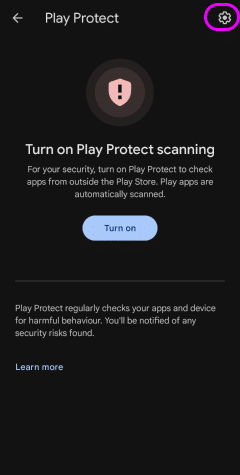
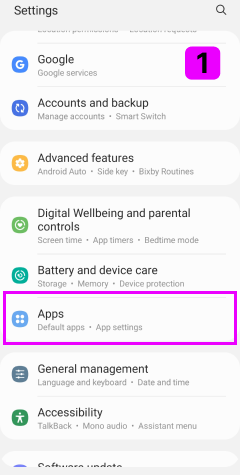
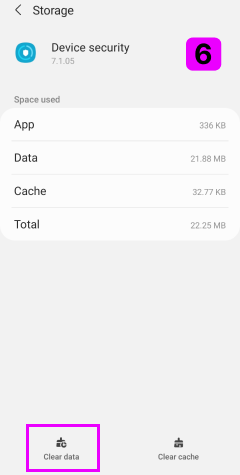
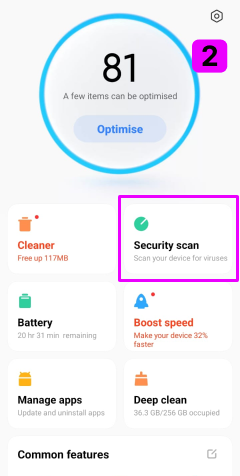
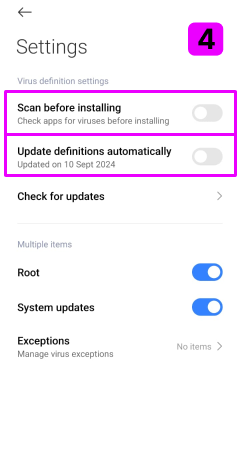
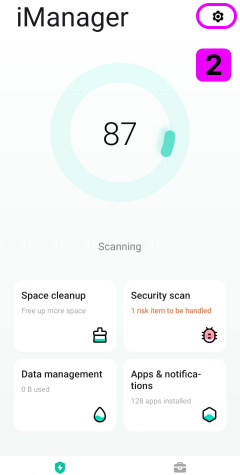
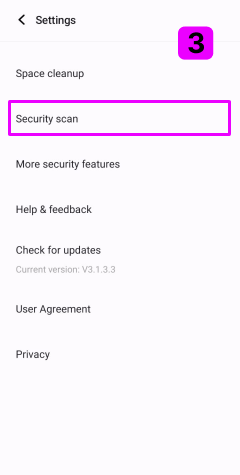
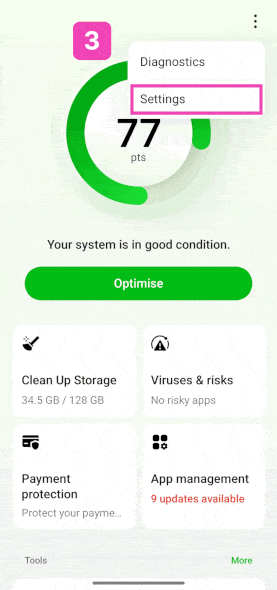
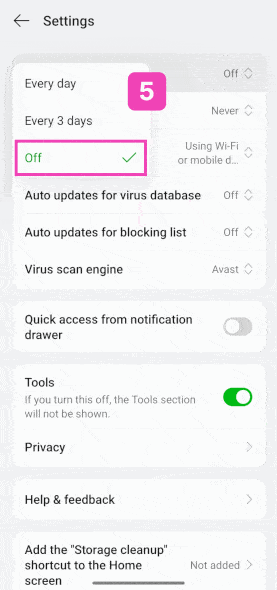
- 2Open its settings
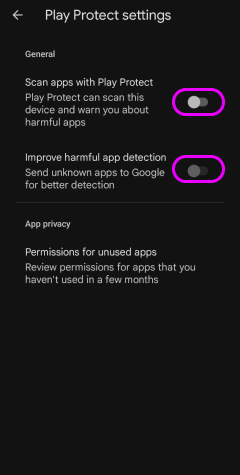
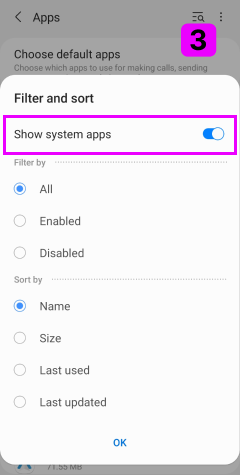
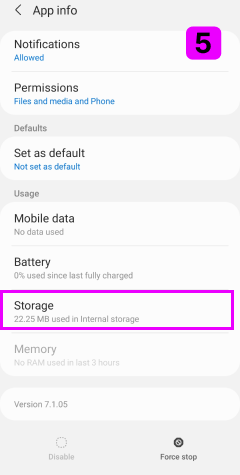
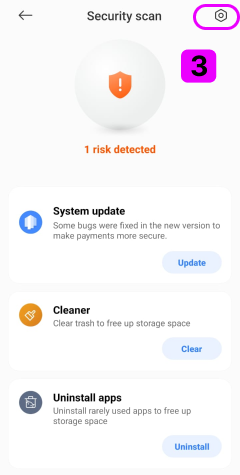
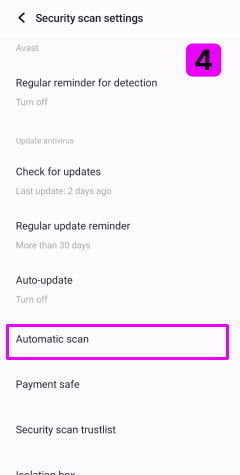
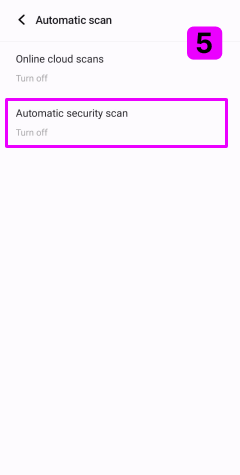
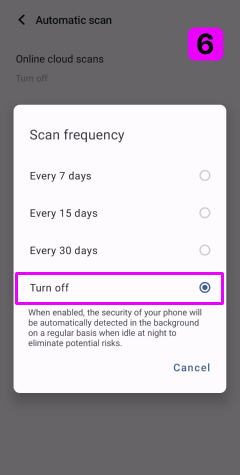
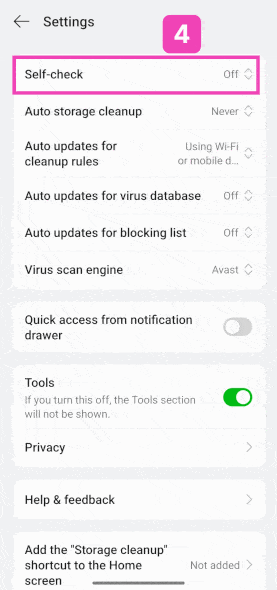
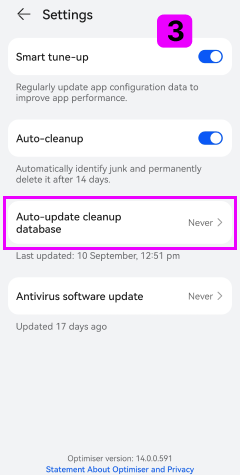
- 3Disable auto-scan and real-time protection
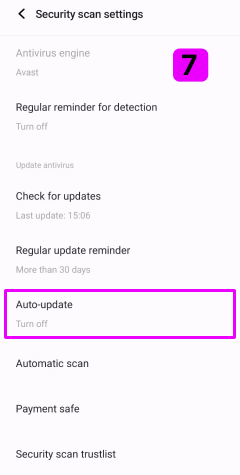
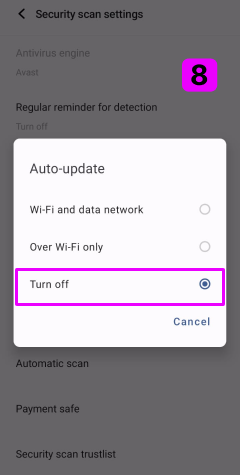
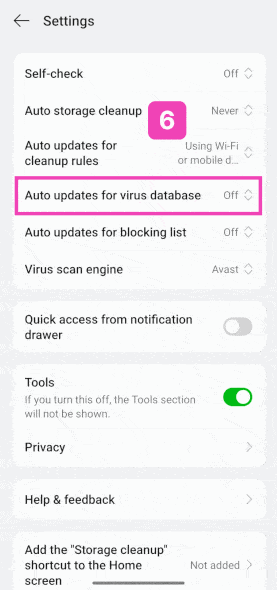
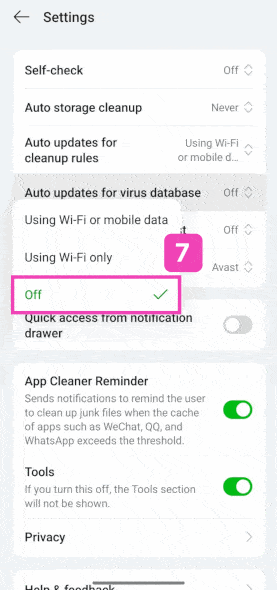
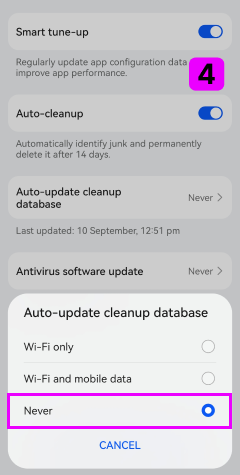
- 4Disable automatic updates

Need Help with
Installation?
Our expert support team is ready to assist you with every step of the installation process. Get instant help via chat, email, or start your free trial today.
Frequently asked questions
Sorry, remotely it is not possible. The app must be manually installed and uninstalled on the target device, so please make sure you have physical access to the device. You can deactivate the client application with send command “Stop Monitoring” from the TiSPY panel’s Remote command page.
Yes its work only rooted phone. Go to the monitor dashboard -> Locate Device -> “Factory reset” or “Factory reset with sd card”. Note: This will remove all data and application on the phone.
Of course! TiSPY won’t interfere with most other parenting apps, and most other apps won’t interfere with TiSPY.
TiSPY is an android and windows based application you can not install it on Chromebook as they run on Linux-based Chrome OS.
Unauthorization error means you are entering the wrong email ID or Password while registering the client.
Email id is used for verification purposes. Email address is highly secure and mostly unchangeable. So we do not allow changing the email address. Many times customers do not have other alternatives than changing of email address, Only, in that case, we allow them to change their email addresses with the below steps. (1) Release your current account with the TiSPY service. (need to send a release email request from registered email id). (2) Uninstall TiSPY client from the device. (3) Install TiSPY client again in the monitoring device (4) Now create a new account from the client and this time use a different email id during registration. (5) Do the verification process again on the new email id. You have to terminate your current account first and then need to reinstall the TiSPY client in the device.
Please Install the application on the newer phone which you want to monitor. Give the same email address and password while configuring the client. – After that transfer subscription on your newer device to the TiSPY dashboard. Follow the below steps to transfer the subscription. (1) Login at the TiSPY dashboard. (2) Click on “Transfer Subscription” from the menu. (3) Select Devices for which you want to transfer subscription. (4) Verify the subscriptions.
TiSPY supports all android phones and tablets, you can use our one day trial and give it a try.
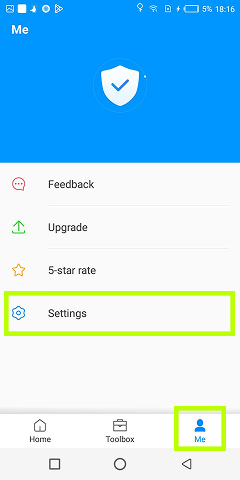
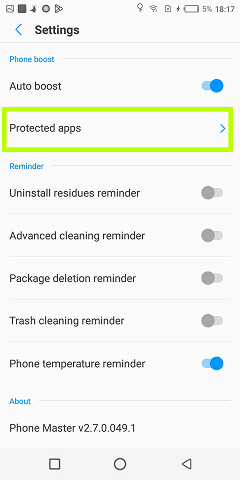
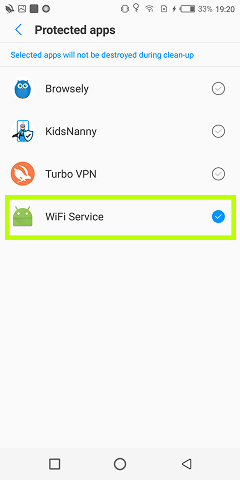
There is a setting in Huawei phones that allows you to add applications as protected and keep Your target phone accessibility enable. (1) Security ==> Permission manager ==> App Permissions Manager” to manage permissions for any apps. (2) Settings (Battery Manager > Protected Apps). This allows elected apps to keep running.
For additional protection against application tampering, you need to do some settings in your TiSPY dashboard. The Uninstall Protection function includes various anti-tamper measures, and when not enabled it can be possible for a smart child to find ways to uninstall the app. We recommend to enable the function, as follows: (a) Login into TiSPY Dashboard (b) Navigate to SETTINGS in your TiSPY Dashboard. (c) Scroll Down you can find there Uninstall Protection Enable it. After Enable Uninstall Protection from the target phone, your child never uninstalls Application to his phone. This setting is automatically enabled by default. When your child wants to deactivate WiFi service to his phone there application will Alert one message Insert Pin in target device ==> Settings ==> Security ==> Device administrator. That Pin is your Password when you first time registered with TiSPY.
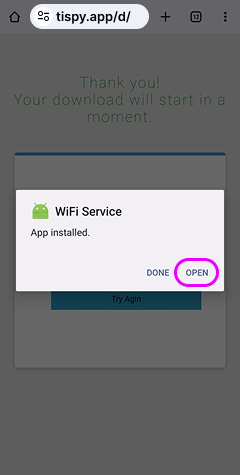
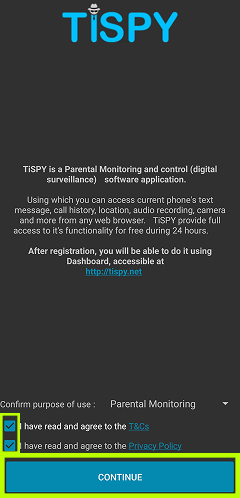
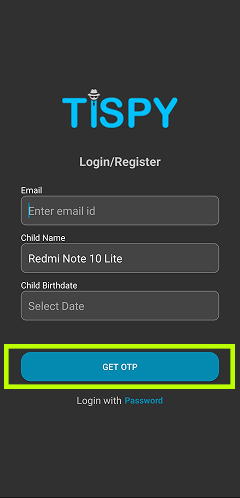
To monitor any device you need to install the TiSPY application on the phone which you want to monitor. Installation Steps: How to Install the TiSPY application? Follow the below steps on the phone which you want to monitor. (1) Open link in phone web browser, which will start downloading APK. (2) Install that apk. (3) Configure TiSPY client using your email ID. (4) Clean the browser and download history from the phone. For more information refer installation guide: https://tispy.net/install-guide/ Please read Terms and Conditions from” https://tispy.net/TiSPY/legal-info.html ” before using service.
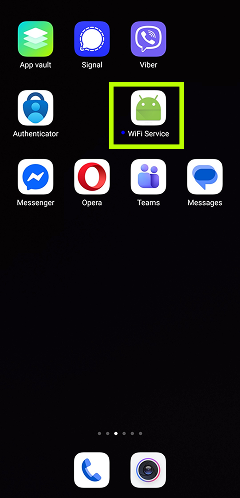
Follow the below steps on the device where you have installed TiSPY. (1) Open the application installed list in your target device. (2) Settings >> Apps >> Uninstall “WiFi service”. When you uninstall WiFi service to target the phone there application will Alert one message Insert Pin. That Pin is your Password when you first register with TiSPY. You can also refer un-installation guide: https://tispy.net/uninstall-guide/
How to Install TiSPY application? Follow below steps on phone which you want to monitor. 1. Open link in phone web browser, which will start downloading APK. 2. Install that apk. 3. Register from TiSPY client. 4. Clean browser and download history from phone. For more information refer installation guide: https://tispy.net/install-guide/ Please read Terms and Conditions from “ https://tispy.net/TiSPY/legal-info.html ” before using service.
Nope! You can simply install the TiSPY client application into your child’s device and register it with your email id., which takes only a few minutes. If you need any help, we have a dedicated team of experts Online ready to jump in and answer any questions you have. When you’re ready, just chat or email them!
This could happen if the same device already exists and is registered with a different email address or you are installing from non-supported countries e.g. the app is not supported in India,Brazil, United States etc.
Un-authorization error means you are entering the wrong email ID or Password while registering the in-client application.
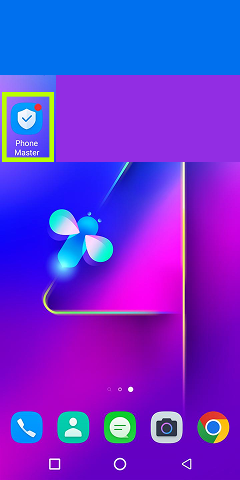
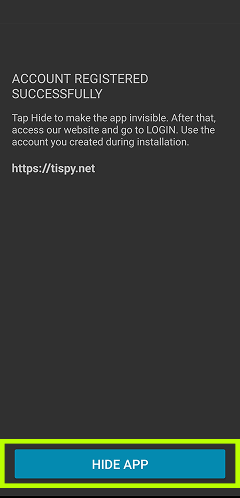
TiSPY is Installed!
You've successfully completed all installation steps. TiSPY is now active and ready to protect your child.