Post Installation Settings for Android 9, 10, 10+
Post Installation Settings
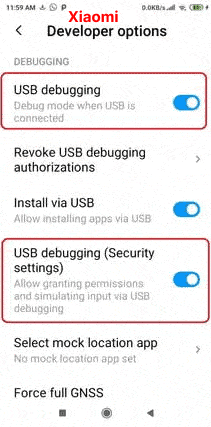
1. Enable USB Debugging on the Target Phone
Step 1:
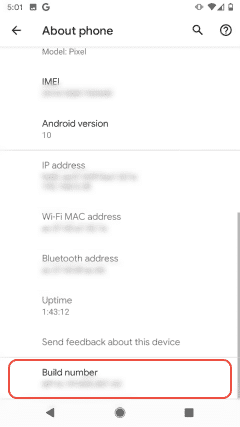
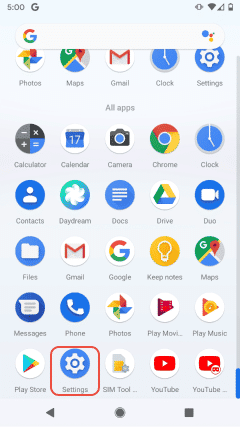
Go to Menu > Settings (This can be found in Apps or pop-up menu.) > About phone (About, About phone or About tablet)
![mobile1](https://tispy.net/wp-content/uploads/2022/08/mobile1.png)
![mobile1](https://tispy.net/wp-content/uploads/2022/08/mobile2.png)
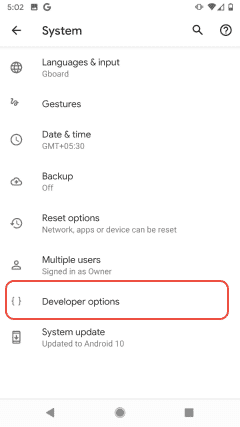
Step 2: Tap on Build number for 4 to 8 times (Once done, you will see a message which congratulates you have become a developer.) > Go back to Settings page > Unlock Developer options > Check the box next to USB debugging
![mobile_1](https://tispy.net/wp-content/uploads/2022/08/mobile1-1.png)
![mobile_2](https://tispy.net/wp-content/uploads/2022/08/mobile2-1.png)
![mobile3](https://tispy.net/wp-content/uploads/2022/08/mobile3.png)
![](https://tispy.net/wp-content/uploads/2023/09/mobile4.gif)
2. Download and RUN the Permissions Tool on WINDOWS Desktop/Laptop.
Download and run permission tool in your windows computer.
![tispy_dot](https://tispy.net/wp-content/uploads/2022/08/tispy_dot.png)
![app](https://tispy.net/wp-content/uploads/2022/08/app.png)
![](https://tispy.net/wp-content/uploads/2022/11/per_w-e1659948810176.webp)
- Please see the steps as follows:
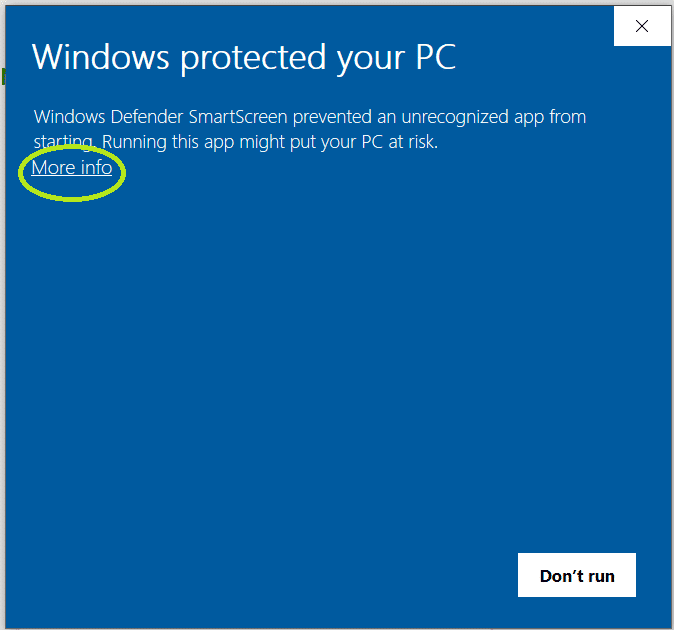
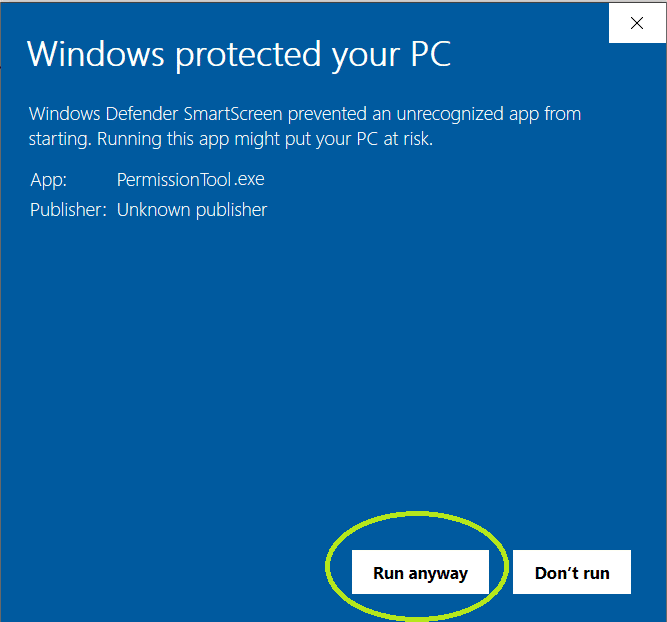
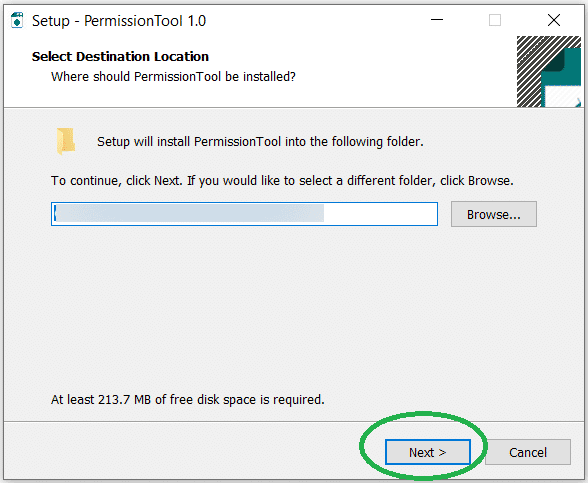
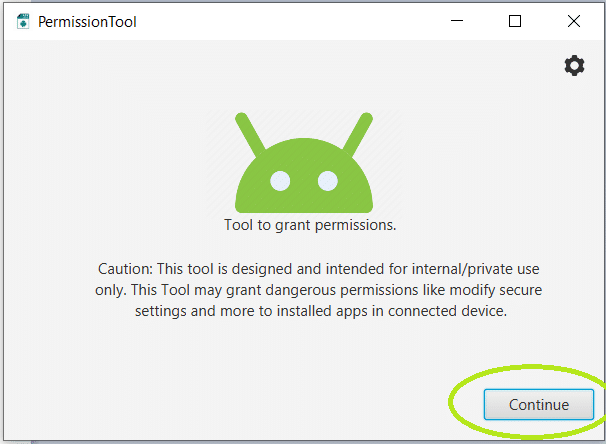
1. Download, Extract and Run the application. Click on “More info” and “Run anyway” and Continue.
![android_10_image1](https://tispy.net/wp-content/uploads/2022/08/android_10_image1.png)
![android_10_image2](https://tispy.net/wp-content/uploads/2022/08/android_10_image2.png)
![android_10_image3](https://tispy.net/wp-content/uploads/2022/08/android_10_image3.png)
![android_10_image4](https://tispy.net/wp-content/uploads/2022/08/android_10_image4.png)
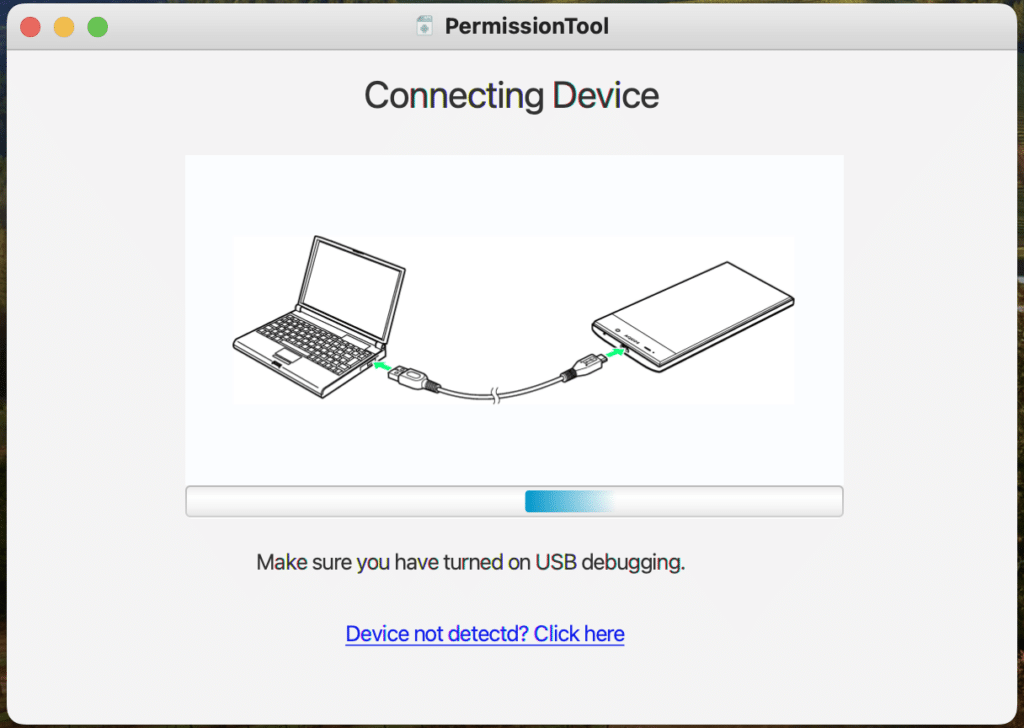
2. Connect the target phone to the computer as shown below.
![android_10_image5](https://tispy.net/wp-content/uploads/2022/08/android_10_image5.png)
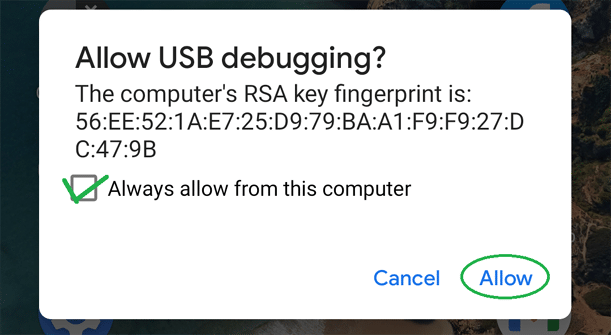
3. On target phone allow “Allow USB debugging”
![USB](https://tispy.net/wp-content/uploads/2022/08/USB.webp)
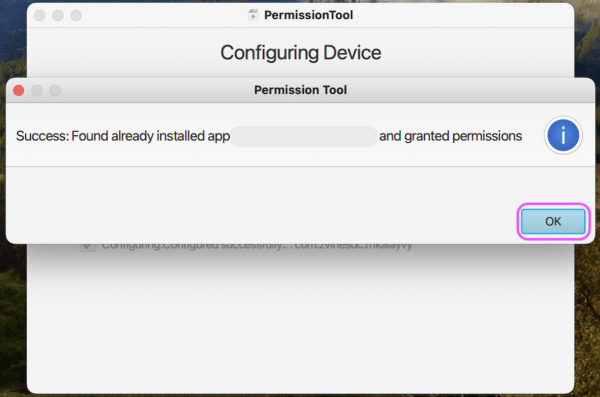
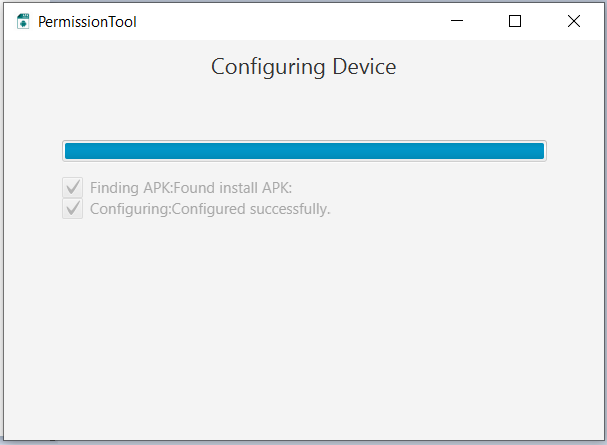
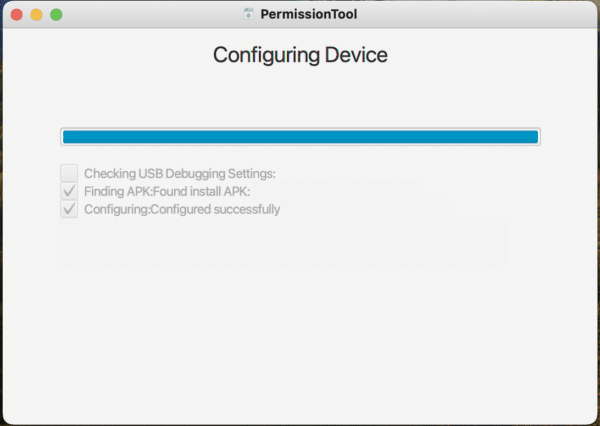
4. The application will automatically configure the device, please keep patience until the below message is obtained.
![permisison tool](https://tispy.net/wp-content/uploads/2022/08/Group_7.webp)
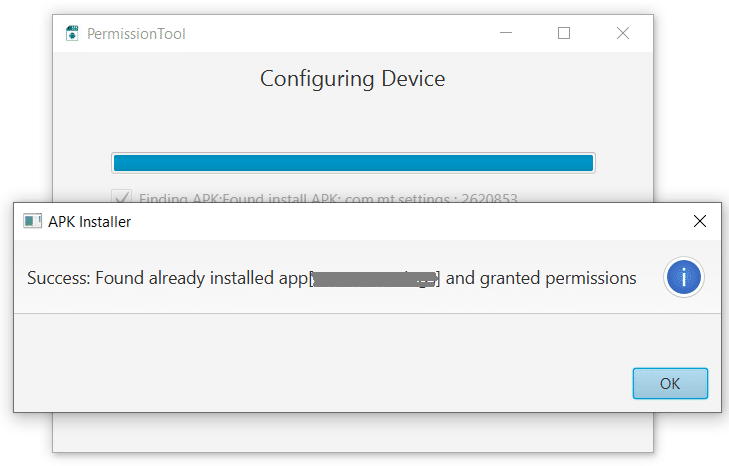
5. Press Ok and complete the process.
![android_10_image7](https://tispy.net/wp-content/uploads/2022/10/android_10_image7-2.webp)
Download and run permission tool in your Mac computer.
For MAC use
- Please see the steps as follows:
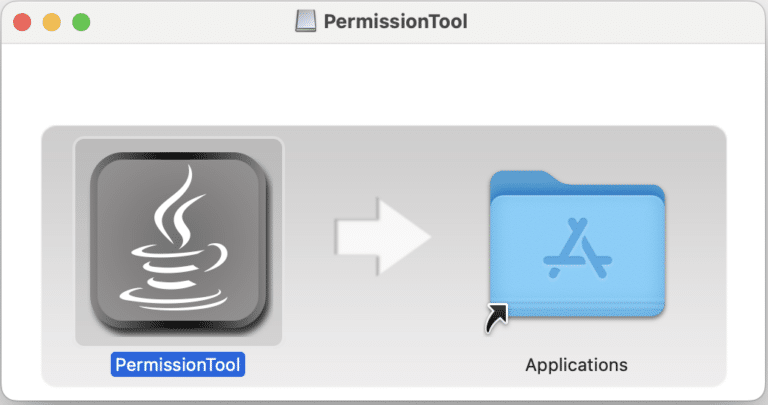
1. Download and open the application. Drag “Permissiontool” to “Application” folder
![](https://tispy.net/wp-content/uploads/2024/01/step-0-768x405.png)
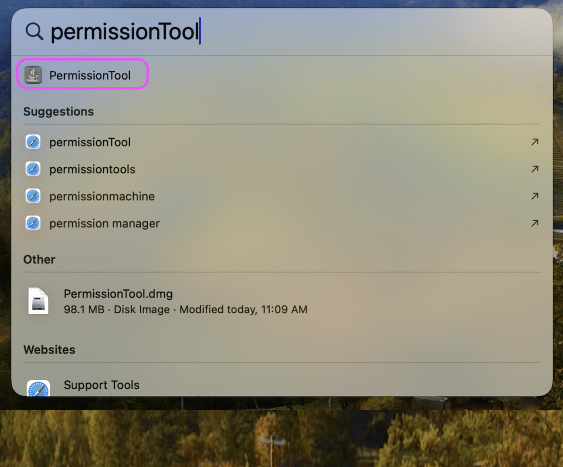
2. Press command + space key and type “PermissionTool”
![](https://tispy.net/wp-content/uploads/2024/01/Group-541-1-4.png)
![](https://tispy.net/wp-content/uploads/2024/01/step-2.png)
3. Connect the target phone to the computer as shown below.
![](https://tispy.net/wp-content/uploads/2024/01/step-3-1024x734.png)
![](https://tispy.net/wp-content/uploads/2024/01/step-4.png)
![](https://tispy.net/wp-content/uploads/2024/02/step-4-1024x728.png)
4. On target phone allow “Allow USB debugging”
![USB](https://tispy.net/wp-content/uploads/2022/08/USB.webp)
5. The application will automatically configure the device, please keep patience until the below message is obtained.
![](https://tispy.net/wp-content/uploads/2024/01/step-5-600x426.png)
6. Press Ok and complete the process.
![](https://tispy.net/wp-content/uploads/2024/01/step-6-600x397.png)